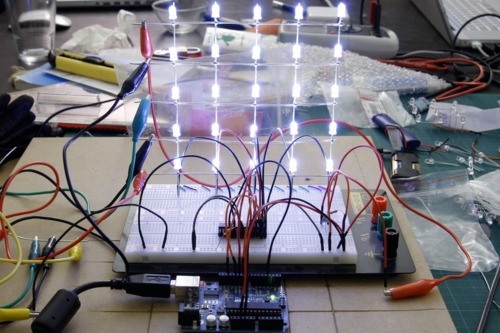
Building the 2x2x2 cube was really easy. We literally bought the Arduino, a couple of LEDs and cables (as described here), put it together and it worked. Of course we wanted to go to the next level immediately, just like in a video game. With the same principles we built a 3x3x3 cube but this time it featured resistors in series with the LEDs, transistors for switching the levels and a socket which allowed us to switch the board or the cube easily. I will explain each step starting with the soldering.
Soldering the LEDs together
Basically there a different ways to do it but all variants share the same principle of having layers and columns. Also its best to have some kind of grid to make sure the connections are as straight as possible.
One way of building a cube is to solder horizontal layers and stack them on top of each other by connecting the cathodes, only using the LED pins.
Instructions for horizontal layer soldering:
1. Get cheap wood like MDF and draw the desired grid onto it. For regular LEDs the grid width should be 2,5cm.
2. Drill holes where the lines of the grid cross and make the holes 5mm wide (if you’re using regular 5mm LEDs). Start with a 4mm wood drill which could be sufficient.
3. Bend the anode (longer LEG) 90° like you can see on the picture below and put the LEDs inside of the holes
4. Solder the anodes together

5. Cut of two anodes (longer leg) of other LEDs and use them to stabilize the layer
6. Cut of the overlapping wire and the first layer is complete

7. Bend the cathodes to the side like you can see it in the picture so that you can stack the layers on top of each other. You can skip bending the cathodes for the last layer. In the following picture I did only bend the front LEDs.

8. Build two more layers and solder them together.
Instructions for vertical layer soldering:
The other way of soldering together a cube is to build vertical layers. This has the advantage of being able to switch single vertical layers. In the horizontal version it is close to impossible to fix a broken LED in the middle of the cube. Also allows to build larger cubes that a more solid and straight. This is how you do it:
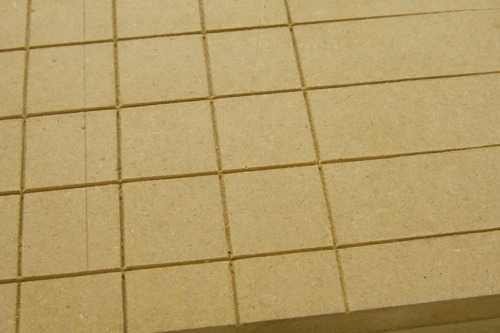
1. Get some cheap wood like MDF and draw your desired grid onto it. Then use a saw, a screwdriver or a cutter knife to cut out the grid like in the following picture.
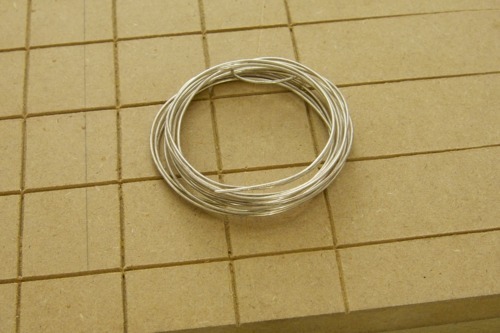
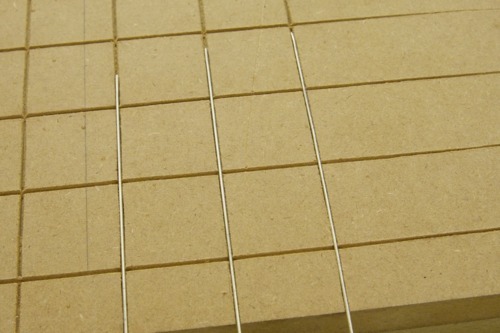
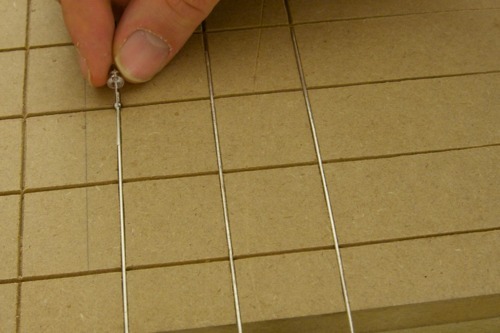
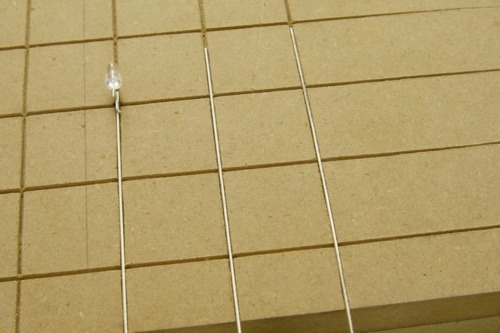
2. Get some copper wire and cut it to pieces. Then use two pliers to straighten the wire. Grab the ends of the piece of wire and pull it straight. You can feel when the wire is extending. Release it carefully and you should have a straight piece of wire. I used copper wire which is mixed with silver. I couldn’t find any good translation for “Versilberter Kupferdraht”.

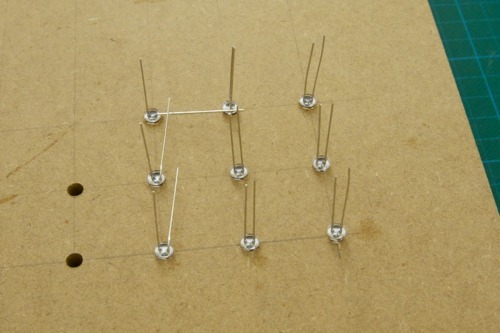
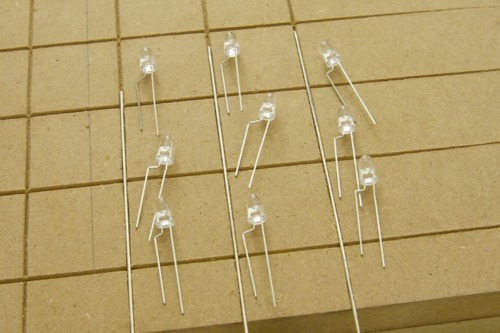
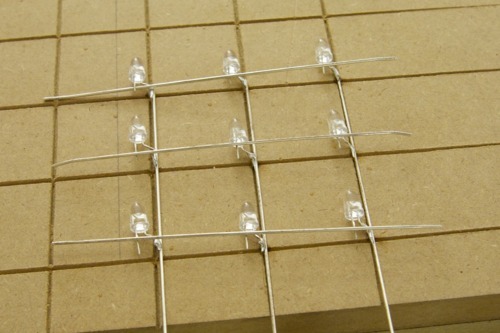
3. Get 9 LEDs and bend them like you can see on the picture. Then shorten the cathode
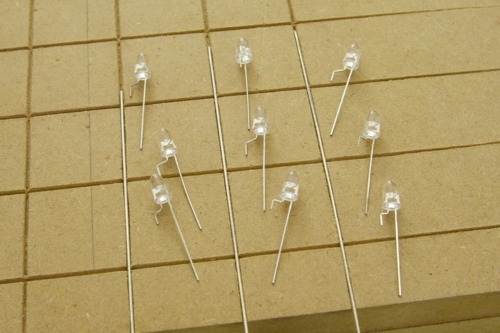
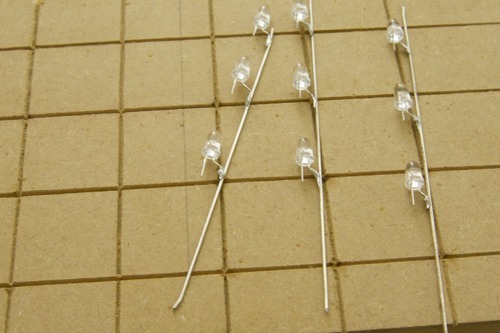
4. Hold the soldering iron onto the junctions and apply solder. Then grab an LED, head up the solder on the wire, hold the LED like on the picture. Distribute the solder and remove the soldering iron while still holding the LED for a second or two.
5. Attach all the LEDs that way. You can shorten the anode as well by the way.
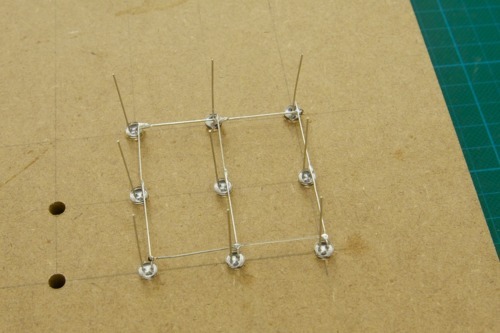
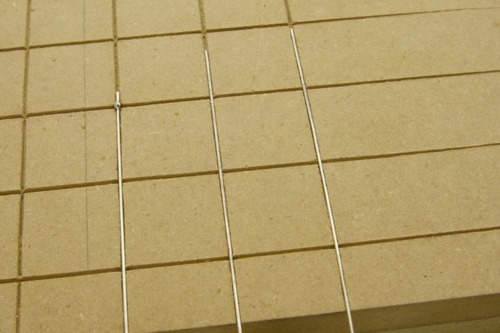
6. Lay out the columns onto the grid. Cut and straighten three more wires and connect the LEDs horizontally.
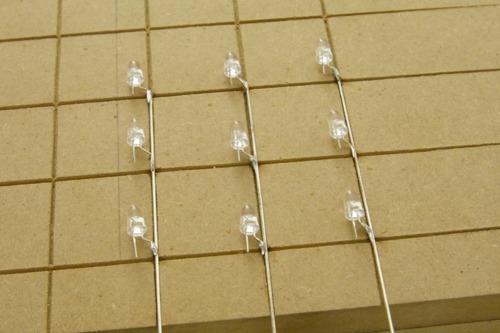
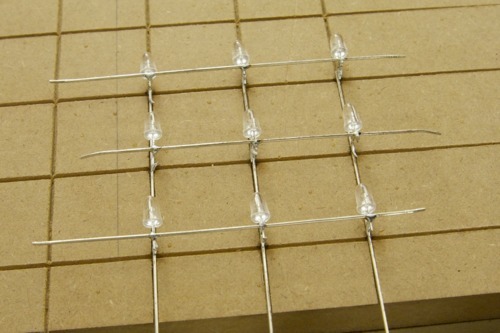
7. Cut of the overlapping wires and you have your first vertical layer
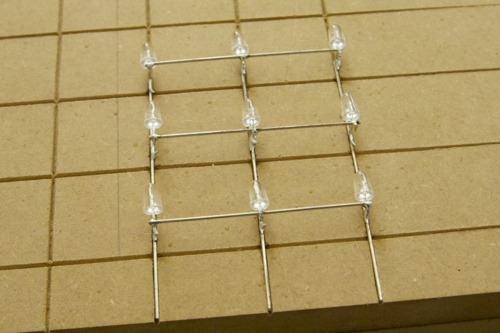
8. Now build two more layers. Put them next to each other, then connect these LED walls horizontally with some more wire but just on the outer sides. Does that make sense? This cube, even if its built from vertical layers will have horizontal common anode layers just like the other cube had. Its just built in a more modular way. Therefor the vertical LED modules need to be connected horizontally in each row.
Now while this seems more work in the beginning, it saves a lot of hassle later on. Imagine building a cube in the horizontal layer way. When the LED layers are stacked on top of each other, 9 cathode connections need to be made every time. As you cube grows it is getting harder and harder to solder it straight. A mentioned before it is also getting harder to extract an LED from the middle. Imagine building a 10x10x10 cube where 100 cathodes need be be soldered together for each layer!
With the vertical LED module approach the stacking is already done. They can be be easily plugged one after another into their sockets and only need a few connections horizontally so connect them and to stabilize the cube. Since the horizontal connections are mostly on the outside of the cube, they can be easily removed to take out / replace individual modules.
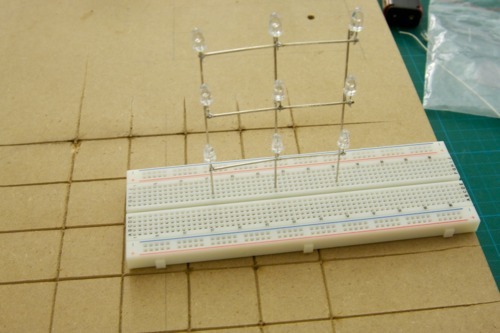
Finally the cube will be more stable if straightened wires are used instead of the LED pins. I build a 5x5x5 test module which I could stick into my breadboard. I even attached a bunch of cables and its still stable.
This 5×5 matrix is again completely powered by the Arduino which is connected to my MacBook Pro. There are only a few Arduino pins used. Two of them supply the power and five control the LED driver chip which is called TLC5940.
If something about the soldering part is still unclear, contact me please.
One thought on "Next Stop: 27 LED Cube Street"