For a while I was somewhat interested in playing around with a Software Defined Radio (SDR). Recently I bought myself an entry level SDR and started exploring.
One of the first things I was interested in was receiving and tracking ADS-B data. This is a specific radio transmission used by aircraft to broadcast positional data, among other things. This is what sites like flightradar24 are based on. Most information that is displayed there is based on ADS-B data received by probably thousands of individual receivers around the globe.
The SDR I bought was the ubiquitous RTL-SDR Blog v4 with a basic antenna kit which cost me 99€.
This is where I bought it: https://www.wimo.com/de/rtl-sdr-v4-kit
First steps
I am a total beginner when it comes to radio and specifically software defined radios apart from very general knowledge of how electro magnetic signals work. Therefore I had to do quite a lot of research before I received and decoded the first actual ADS-B message.
Question number one: What kind of antenna is needed to receive ADS-B?
The frequency that is being used can be easily looked up. It’s on 1090Mhz. But what is somewhat harder to find out is the optimal length and orientation of the antenna.
The kit which I bought contains a simple dipole antenna base with two different pairs of metal telescopic antennas. After a bit of googling I found out that there is a formula for calculating the optimal length of a dipole antenna for a given center frequency. Then I looked up a basic Dipole Calculator like this one: https://www.wireantennas.co.uk/dipole-calculator
I ended up with 13.086cm of total length for the dipole. Then I screwed on the two short telescopic antennas to the dipole base, connected everything and started SDR++ to have a look.
Unfortunately there wasn’t much to see but I also recognized the many options to configure your SDR in the software and that I barely knew what any of them meant or related to. So the search continued for “ads-b sdr settings” and the like. Eventually I found some youtube videos that had the crucial information:
ADS-B is vertically polarized which means that the antenna should be oriented vertically and switching SDR++ to “RAW” would prevent it from trying to “interpret” the signal since it’s digital in nature anyway.
(Bonus Tip: Also try both possible vertical orientations since one arm of the dipole is connected to ground / the shield and the other arm to the conductor – some people claim that the orientation can make a difference but I can’t neither confirm nor deny from my limited tests)
Unsure of whether this would work from within my apartment in the middle of the city, I started up SDR++, tuned it to 1090Mhz with autogain enabled and the antenna mounted to a photo tripod, I moved around to see if I could catch any signals. Eventually I found a spot where these patterns appeared.
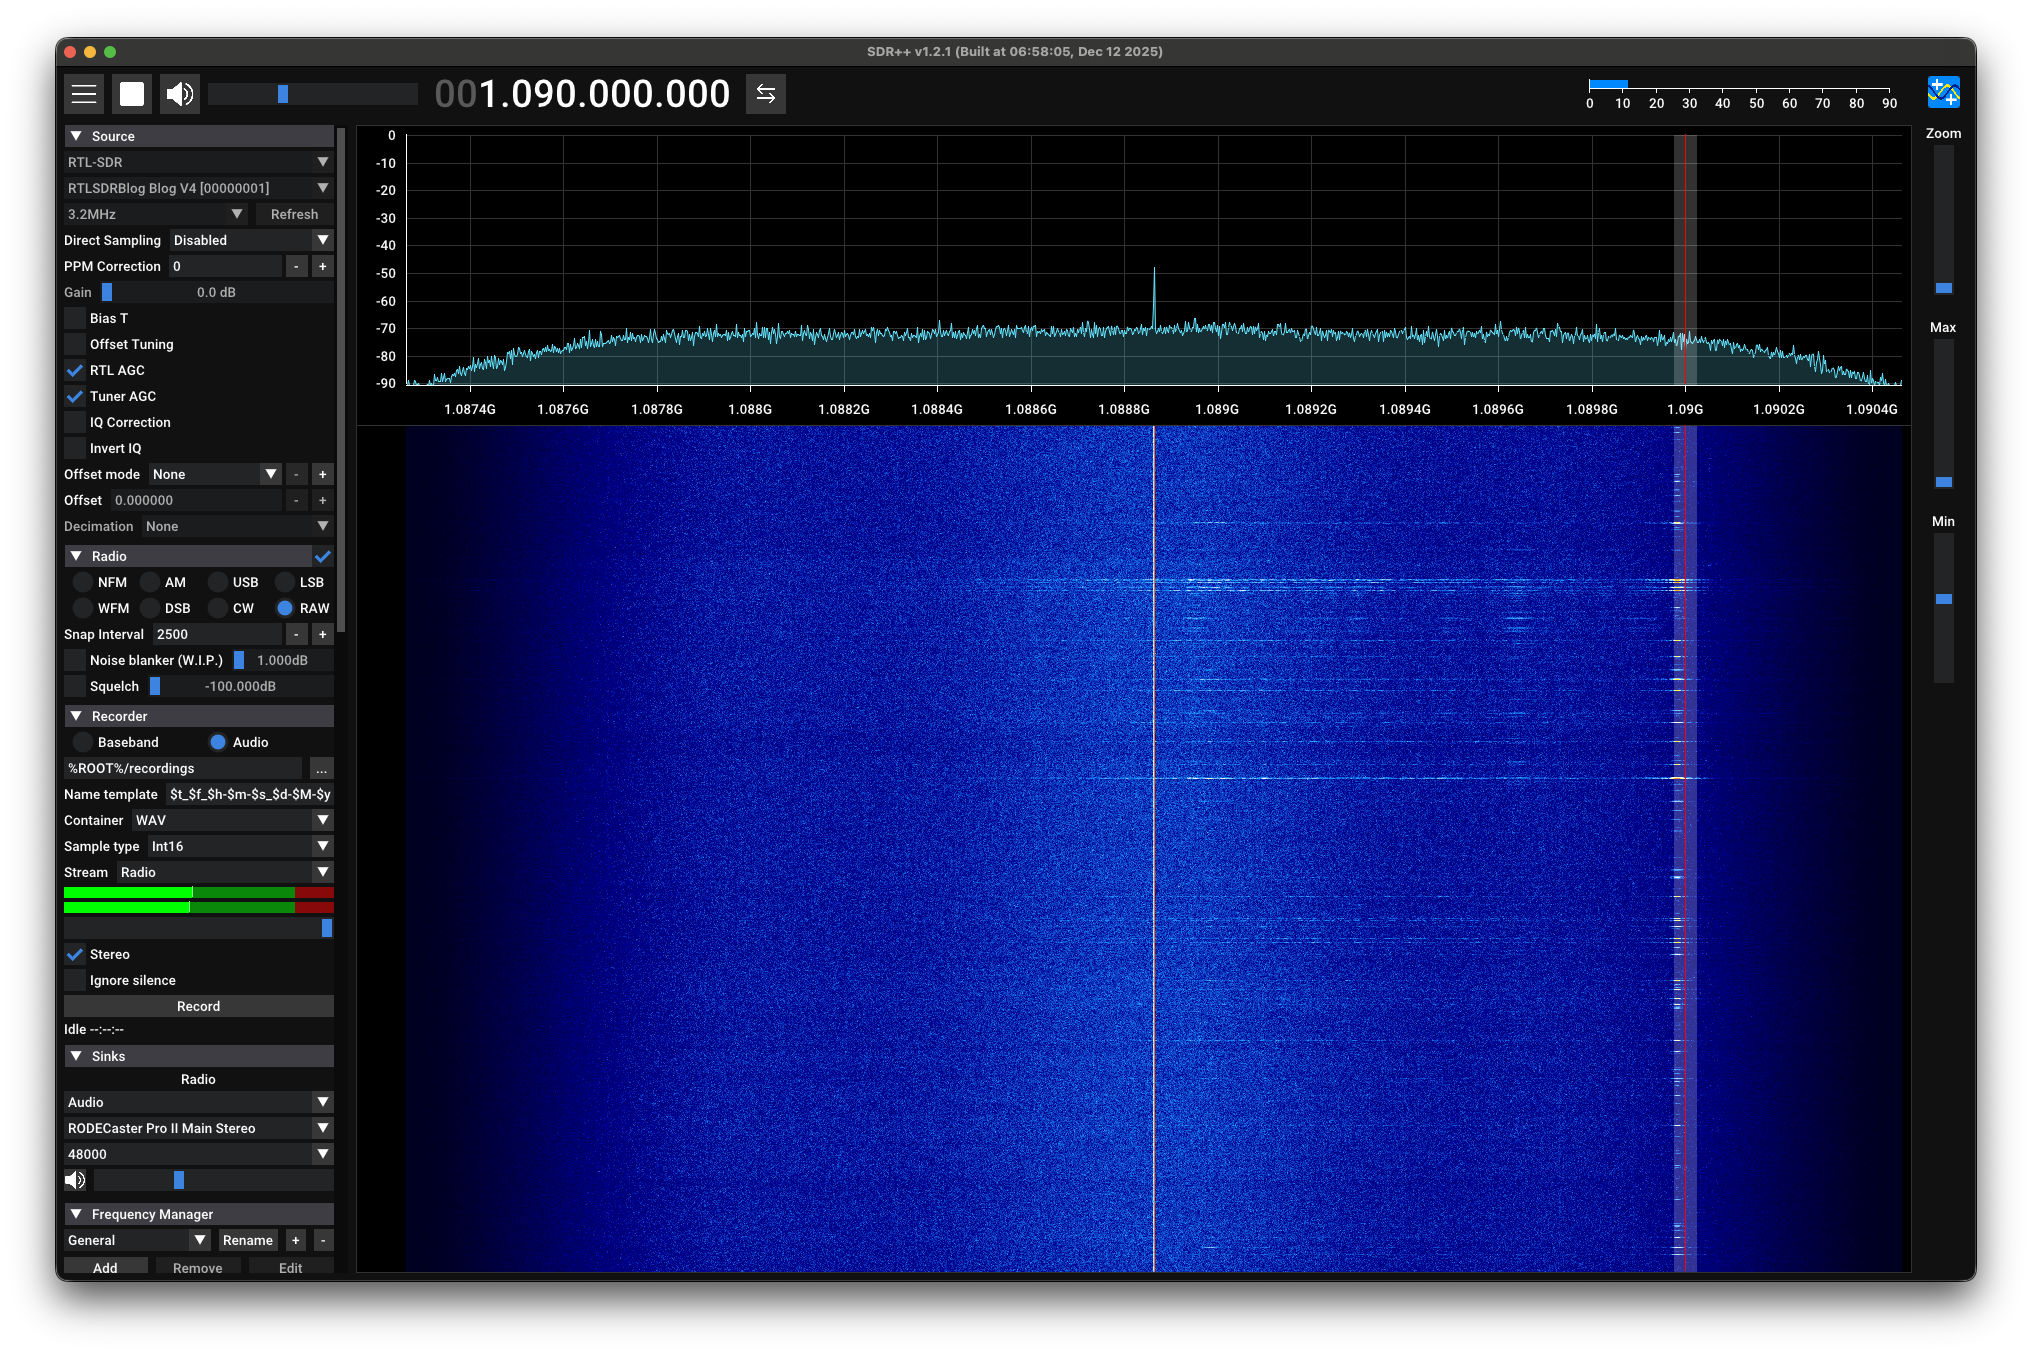
Then I sat down the tripod and watched the signal come in.
How to decode and visualize the data?
Now that I was somewhat sure that I actually receive ADS-B data, I wondered how I could best decode and visualize it, ideally on my mac without much hassle. If you’re on Linux most of the steps are much simpler and sometimes even available as package.
I’ll spare you the details of my research which lasted several days and took me down various rabbit holes. At first I found a tool called dump1090 which you can even install via homebrew. There are many forks and permutations of this tool and long story short I’m currently using a toolchain which is very similar to websites like https://adsb.lol
The toolchain essentially consists of two tools
Building this on macOS was not super straight forward but with a little bit of LLM help decoding the compiler errors I got both to work.
For readsb I had to edit the Makefile and remove all mentions of Werror which didn’t work for some reason.
git clone https://github.com/wiedehopf/readsb.git
cd readsb
perl -pi -e 's/(^|\s)-Werror(\s|$)/ /g' Makefile
make RTLSDR=yes CPPFLAGS="-I/opt/homebrew/include" LDFLAGS="-L/opt/homebrew/lib"
That compiled successfully on my M4 mac running macOS 26.2 (Tahoe). You might need to install some dependencies via homebrew like librtlsdr. Check the project repo for the required packages.
After the compile worked, I could start readsb like this
mkdir -p ~/src/adsb/json

[~/src/readsb:dev*] ./readsb \
  --device-type rtlsdr \
  --lat 52.5200 --lon 13.4050 \
  --write-json ~/src/adsb/json \
  --write-json-every 1 \
  --db-file "$HOME/src/readsb/aircraft.csv.gz" \ (more on this flag in a bit)
  --net
Now you should see output in the terminal as well as in the json directory. All we need to do now is to render it with the tar1090 tool.
git clone https://github.com/wiedehopf/tar1090.git
cd tar1090
ln -s ~/src/adsb/json data
python3 -m http.server 8080
This should allow you to open your browser and point it to localhost on port 8080. You should see something like this.
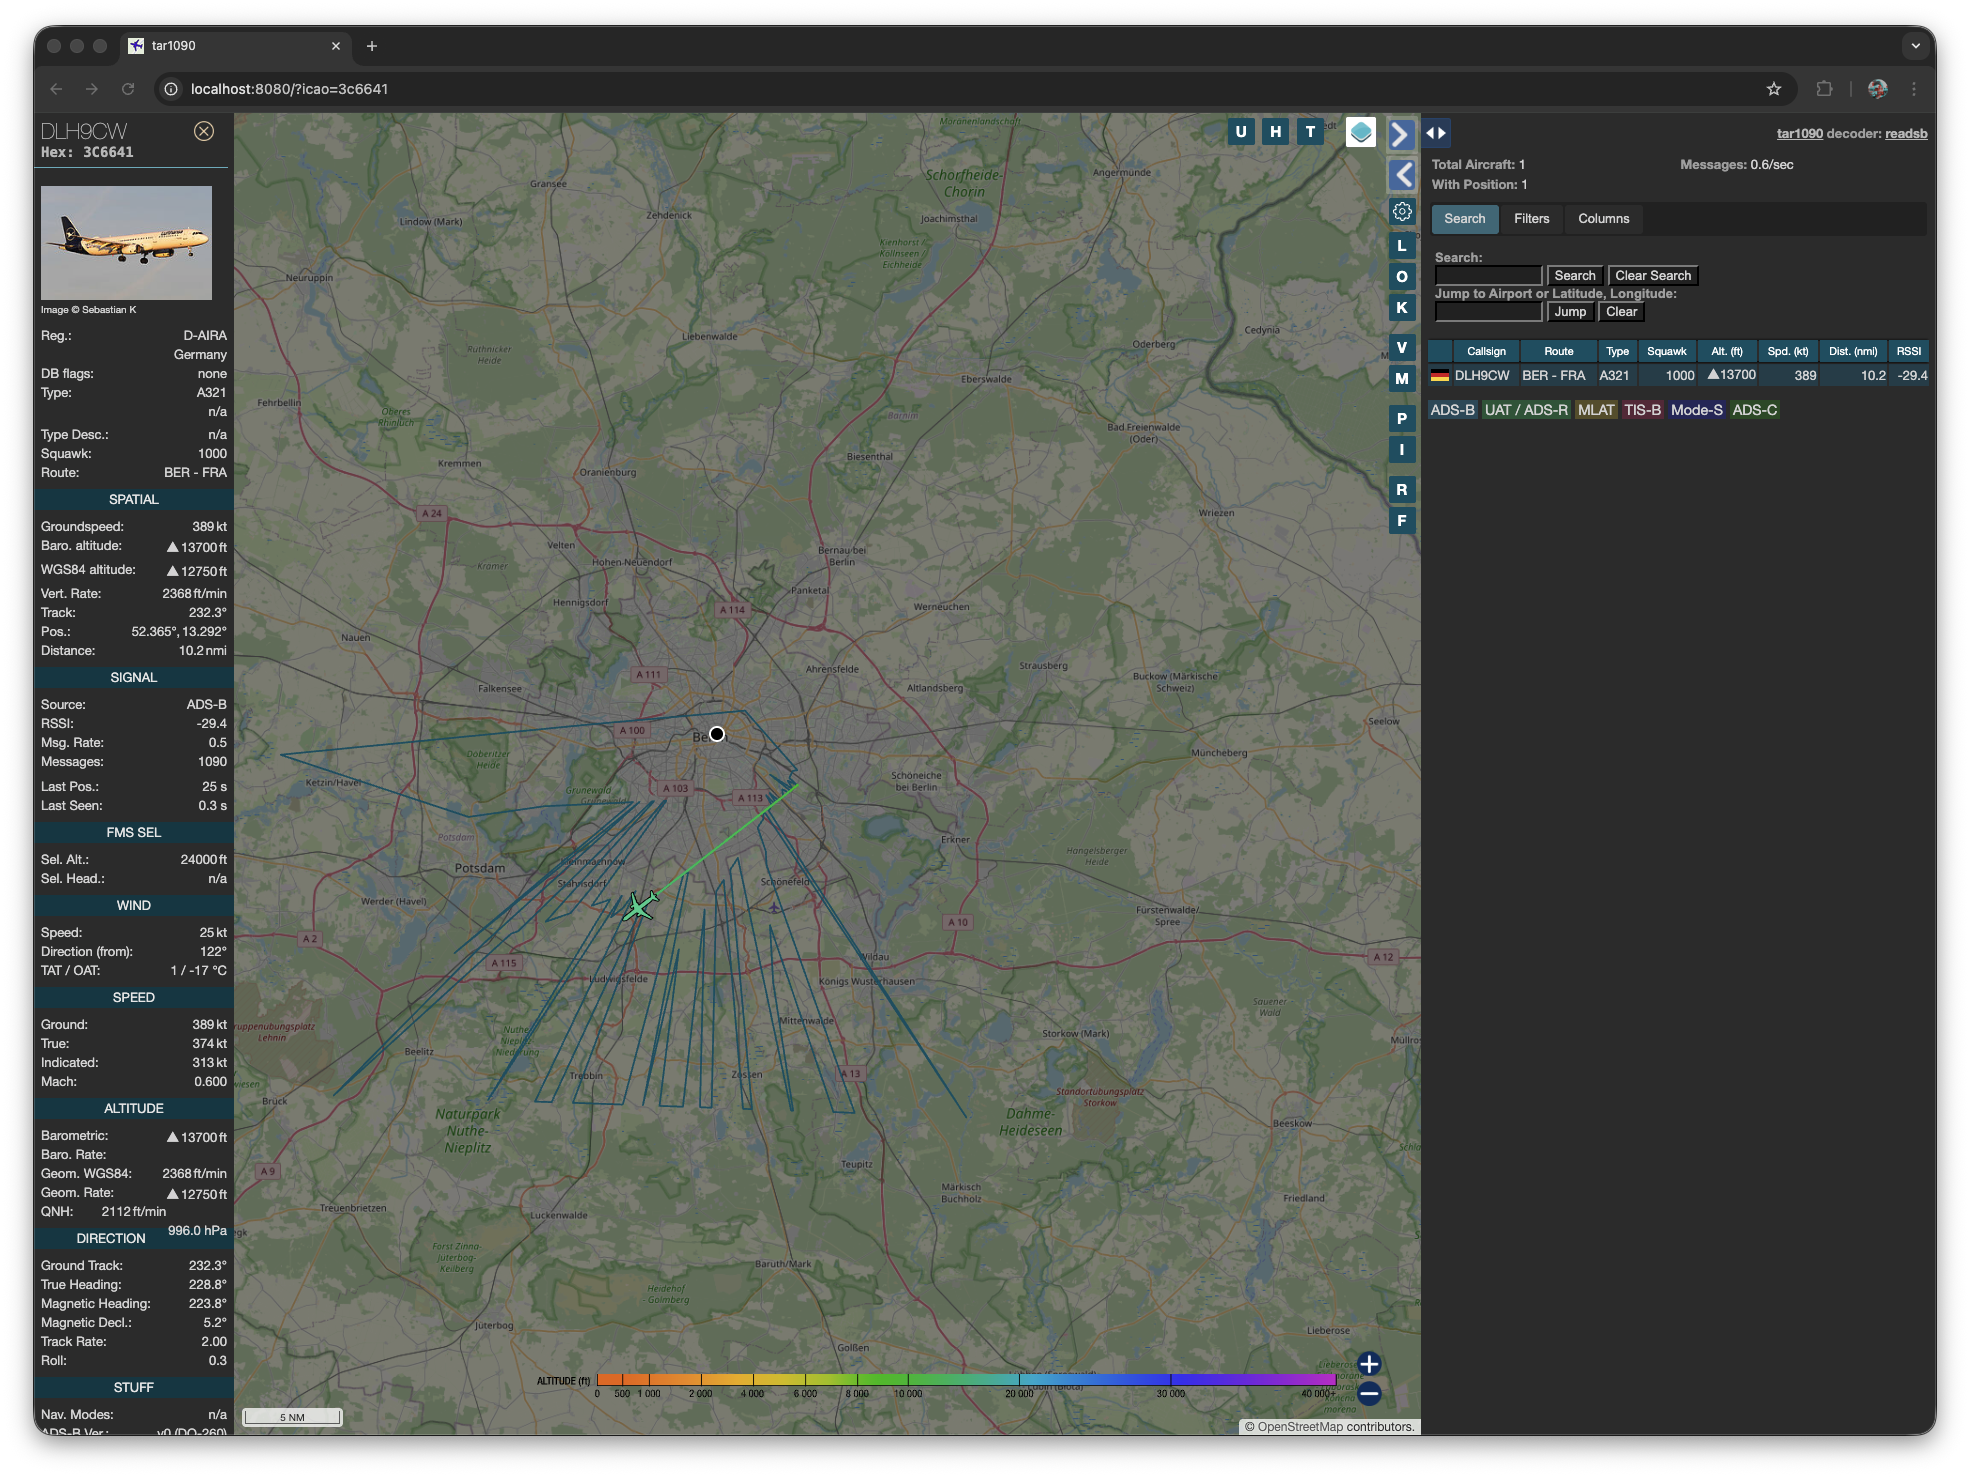
This screenshot was made after leaving both tools running for a while and receiving a bunch of ADS-B data. The blue outline indicates from where I was able to receive data by correlating the messages from the aircrafts with their reported longitude and latitude.
Now the --db-file flag for the readsb tool allows you to match airplane registration codes with airplane models so if you want to see the airplane type you need to download the most recent db file from here:
https://github.com/wiedehopf/tar1090-db/raw/refs/heads/csv/aircraft.csv.gz
and set the --db-file flag accordingly.
Lastly you can edit the html/config.js file in the tar1090 folder and uncomment/set these 3 options:
// get flight route from routeApi service default setting (toggle via settings checkbox)
useRouteAPI = true;
// configure route display, possible values: iata, icao, city (can use multiple like this: iata+city)
routeDisplay = 'iata';
// which routeApi service to use
// routeApiUrl = "https://adsb.im/api/0/routeset";
routeApiUrl = "https://api.adsb.lol/api/0/routeset";
// routeApiUrl = ""; // to disable route API so it can't be enabled by a website visitor
Note that you might get API rate limited if you live in a busy area with many flights that need to be resolved for their route data.
But that is essentially it. You can see that from within my apartment I’m able to see a bunch of flights with no clear view to the horizon or the sky. Even some aircraft which were north of me. My apartment faces south and so is my antenna but I suspect the houses across the street might reflect some of the signals from the north back to me.
I also had the antenna out once and I could receive signals from A LOT further but for now I’m happy. I might try different antennas or maybe a filter + low noise amplifier specifically tuned for ADS-B but that is not needed to get going.
Put any questions or suggestions in the comments below. I hope this writeup saved some people with a similar beginner knowledge a lot of time.
Hello hukl,
you probably first want to check your sample rate. In the sdrpp window i see something above 2.4MHz. I don’t know anything about your particular hardware, but usually these librtlsdr based dongles will not make you happy over 2.4 MHz sampling rate. They will drop samples, and ADC performance will degrade. rtl_test will help you figure out if your sampling rate over 2.4 MHz is viable or not. Regarding your antenna: You are correct. At 1090 MHz, signals are quite bouncy. I am in a similar situation. City ground floor apartment, balcony directional antenna with high gain pointing at a house across the yard. That is where the signals are coming from. Before buying any hardware, make sure that you are aware of your current situation. Check how much you can get out of the internal LNA of the dongle. Do not listen to much to the Coax boys. If you have a classic window setup, there is a simple rule: The loss of USB cable is 0 db compared to high grade coax cable. Just mount the dongle directly to the antenna. The dipole is nice, a ground plane is better. This is a BNC based design that worked out for me quite nicely https://www.reddit.com/r/ADSB/comments/1gr11k2/my_spider/ For a more constrained space like my balcony, i went full speed directional. After some very python designed yagi https://www.reddit.com/r/Sky_Trackers/comments/1m37jaz/my_best_antenna_so_far_the_yagi/ i went to some more crazy stuff like the lunch box antenna https://www.reddit.com/r/ADSB/comments/1nqu15g/lunchbox_yagi/. Looks ugly, but stuff wit +11 db gain does not have to look nice.
all the best,
Martin
Ouh thank you so much for the comment! Much appreciated! I’ll check out those links for sure. I also have just documented my updated toolchain using your stream1090 tool!
https://smyck.net/2026/01/29/improved-ads-b-toolchain/